Linking Arduino Systems with 433 / 315 Mhz RF Transceivers
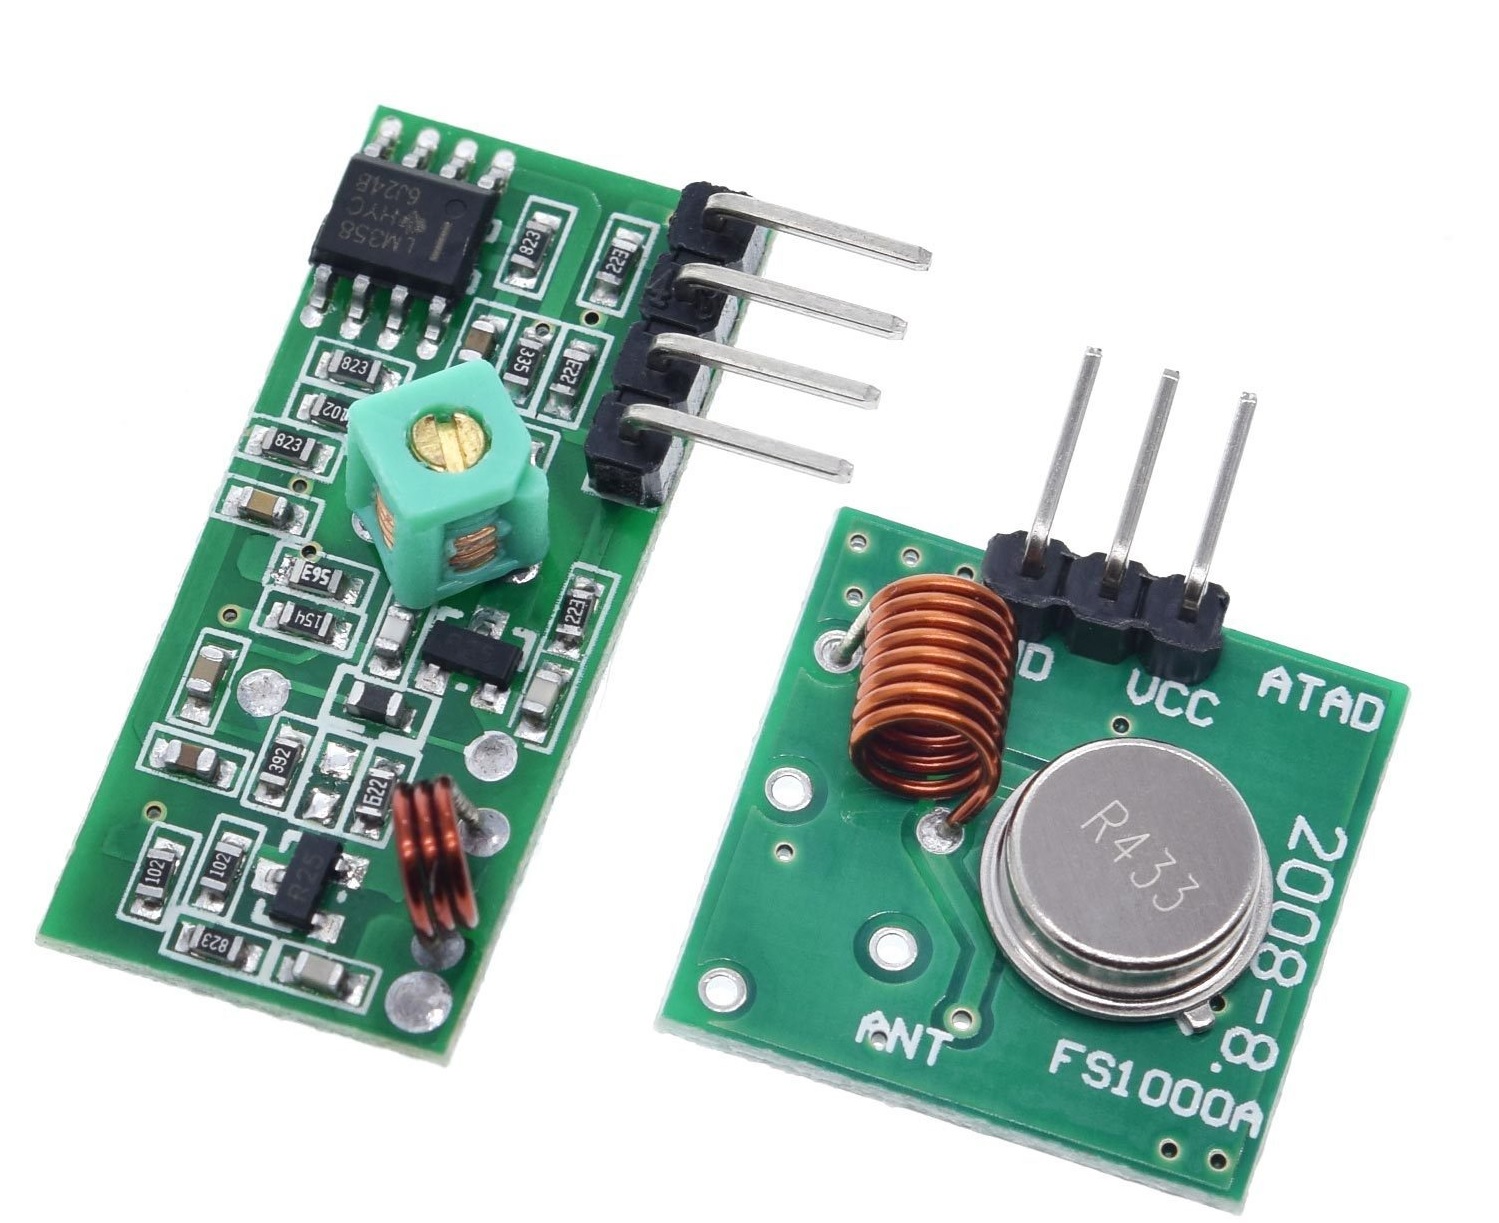
I wanted two Arduino systems to share data, but did not want to use Wi-fi, and I found these 433 Mhz and 315 Mhz RF Transmitters and Receivers that work with the Arduino
The 433 Mhz transmitters and receivers are easy to setup and use
433 Mhz is used for many common remote control systems, and low power transmitter/receiver are available from many manufacturers, and can be ordered from aliexpress.com for less that a dollar (and a 45 day delivery wait) – recently, 06/27/2022, the delivery times have improved to 15-30 days, strangely, the bigger the order, the faster the delivery times
The Transmitters and Recievers are also available in 315 Mhz and are almost identical in cost and design to the 433 Mhz devices
So I ordered 2 sets of each, for relatively cheap parts like this, I typically order a spare so a parts failure won’t cost me an extra 45 day wait
I purchased both the 433 and 315 Mhz systems, and they are almost identical, the transistor on the transmitter has the frequency labeled, the receivers are identical, so if you get them mixed up, trial and error is required to find which is what frequency!
Wiring 433 and 315 Mhz Transceiver to an UNO and NANO
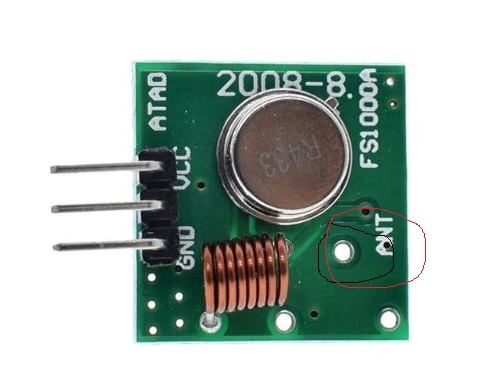
The 433 Mhz and 315 Mhz Transmitters and Recievers are wired the same
Transmitter Wiring
Transmitter Pin       ->       UNO Pin
5v                             5v
Signal                         D10
Gnd                            GND
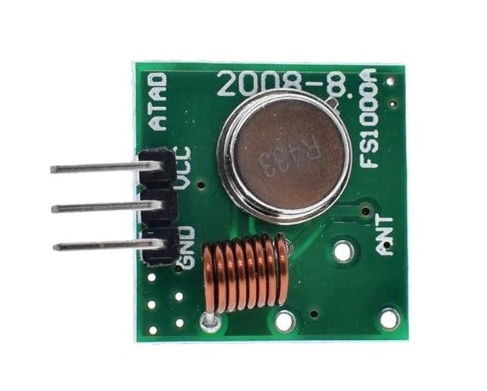
Antenna is connected to a solder pad on the receiver
Receiver Wiring
Receiver Pin         ->        UNO Pin
5v                             5v (VCC)
Signal                         D2
Antenna
Gnd                            GND

Setting up the Drivers
There are many drivers available for the 433/315Mhz transceivers, I chose the RCSwitch driver set, this driver set is setup to control wireless devices and sends three data points, which is useful for this application to send two data points, 1 is the payload, and 1 identifies the sending system/data type
Data point         Length                 Intended Use
Payload            defined by SIZE        Payload
SIZE               length of Payload      defines what is payload
n bits Protocol 1 byte Not used - set to 2
Code Framework for adding the drivers to your sketch
Receiver framework
#include <RCSwitch.h>
RCSwitch mySwitch = RCSwitch();

Void setup()
{
mySwitch.enableReceive(0);  // Receiver on interrupt 0 => that is pin #2
}
Void loop

if (mySwitch.available())
{
int value = mySwitch.getReceivedValue();
if (value == 0)
{
Serial.println("----error, invalid message");
{
Payload = mySwitch.getReceivedValue();
Size = mySwitch.getReceivedBitlength()
Protocol = mySwitch.getReceivedProtocol()
//print payload to serial port for verification
Serial.print("Payload received ");
Serial.println(payload);
//----insert program actions on received data here
}
mySwitch.resetAvailable();
Transmitter Framework
#include <RCSwitch.h>
RCSwitch mySwitch = RCSwitch();

void setup() {
// Transmitter is connected to Arduino Pin #10
mySwitch.enableTransmit(10);
}

void loop() {
/*  using decimal code */

mySwitch.send(5393, 24);
delay(1000);

mySwitch.send(5396, 24);
delay(1000);

delay(20000);
}
Linking Arduino Systems with 433 / 315 Mhz RF Transceivers
![]()