Setup a 3D printer with Marlin 1.1.9
Drivers and software changes required to setup a 3D printer with Marlin 1.1.9
Helpful Links and Settings to setup Marlin 1.1.9 for your printer
CH340/G Software Drivers
– Required for Mega2560 or NANO with CH340 or CH340G chip
https://www.snapwhole.com/software/CH341SER-works.exe
When you connect a Chinese Arduino Mega3560 or Nano that uses a CH340 or CH340G USB to Serial chip, a driver will be install, but you will not be able to upload programs from the IDE
Download and Install this driver on your Windows 10 System
Your Windows 10 System will say it has the correct drivers, BUT IT DOES NOT!,
After you install this driver you will be able to communicate with the Mega2560s and Nanos from China
Software is provided as a convenience, use at your own risk
Driver will install with a default Serial Speed of 9600,8,n,1
Arduino Desktop IDE
U8GLIB for Arduino
– Required for Discount Graphics Controller
GitHub Page for U8GLIB Arduino Graphic Library
To install Library in Arduino is two steps – Add in the libary and then activate library
Add in the Libary
Download the Zip File In Arduino IDE Select Sketch -> Include Library -> Add Zip Library -> Select the Zip you just download
To activate the Library
Select Tools -> Manage LibRaries -> Set Type to Installed -> Select the U8glib Select Version ??.??.? from the dropdown menu Select the Install Button
If the install button disappears, you have installed the library
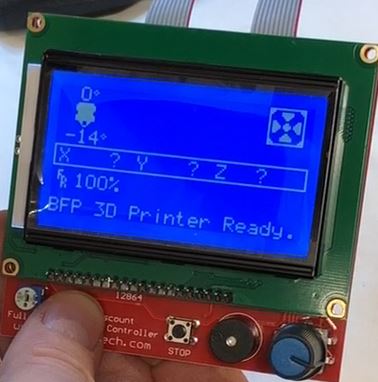
Martin 1.1.9 Changes for Custom Printer Name
While not required, it is nice to define a custom name that will appear on the LCD Screen
Find this line, and change “3D Printer” to your printer’s Name
Example:
//#define CUSTOM_MACHINE_NAME “3D Printer”
//#define CUSTOM_MACHINE_NAME “BFP” //Big Fast Printer
Martin 1.1.9 Changes Required to use RAMPS 1.4
Load Marlin 1.1.9 software into Arduino
Find tab boards.h and there are 4 lines that define RAMPS 1.4
#define BOARD_RAMPS_13_EFB 33 // RAMPS 1.3 / 1.4 (Power outputs: Extruder, Fan, Bed)
#define BOARD_RAMPS_13_EEB 34 // RAMPS 1.3 / 1.4 (Power outputs: Extruder0, Extruder1, Bed)
#define BOARD_RAMPS_13_EFF 35 // RAMPS 1.3 / 1.4 (Power outputs: Extruder, Fan, Fan)
#define BOARD_RAMPS_13_EEF 36 // RAMPS 1.3 / 1.4 (Power outputs: Extruder0, Extruder1, Fan)
The most common setting used for RAMPS 1.4 is ~_EFB
Customize these lines for your setup
#ifndef MOTHERBOARD
#define MOTHERBOARD BOARD_RAMPS_13_EFB // change this for your setup
#endif
Marlin 1.1.9 Changes Required to use Discount Graphics Smart Controller
Various Graphics Controller Cards are defined, but commented out, uncomment your graphics card
To Enable the Discount Graphics Smart Controller<> Load Marlin 1.1.9 software into Arduino
Find tab boards.h and find these lines
// ==> REMEMBER TO INSTALL U8glib to your ARDUINO library folder: http://code.google.com/p/u8glib/wiki/u8glib
//#define REPRAP_DISCOUNT_FULL_GRAPHIC_SMART_CONTROLLER
Uncomment this line to use the Discount Graphics Smart Controller
#define REPRAP_DISCOUNT_FULL_GRAPHIC_SMART_CONTROLLER
And download the library and add it to your Arduino Library – See Above
Custom Setting Required for Marlin 1.1.9
Extruder Setting
// This defines the number of extruders
// :[1, 2, 3, 4, 5]
#define EXTRUDERS 1
Head Bed Settings
#define TEMP_SENSOR_0 1 //thermister on hotend – connected to first thermistor input on RAMPS 1.4
#define TEMP_SENSOR_1 0
#define TEMP_SENSOR_2 0
#define TEMP_SENSOR_3 0
#define TEMP_SENSOR_4 0
#define TEMP_SENSOR_BED 0 //thermister type on headbed – connected to second thermistor input on RAMPS 1.4
#define TEMP_SENSOR_CHAMBER 0
Stepper Motor Settings
// Invert the stepper direction. Change (or reverse the motor connector) if an axis goes the wrong way.
#define INVERT_X_DIR false
#define INVERT_Y_DIR true
#define INVERT_Z_DIR true
Extruder Settings
// For direct drive extruder v9 set to true, for geared extruder set to false
#define INVERT_E0_DIR false
#define INVERT_E1_DIR false
#define INVERT_E2_DIR false
#define INVERT_E3_DIR false
#define INVERT_E4_DIR false
if you motors are moving the wrong direction, flip the true/false setting to fix
Steps per Axis
#define DEFAULT_AXIS_STEPS_PER_UNIT {78.7402,78.7402,200.0*8/3,760*1.1}
Example – Piper 1 v2 (200x300x200) uses these settings
#define DEFAULT_AXIS_STEPS_PER_UNIT { 160, 160, 4535.44, 1388 }
160 – 20 teeth pulleys 1/32 microstepping, for 1/16 this value will be 80.
4535.44 – Z steps per mm, for 5/16 threaded rod and 32 microsteps.
1388 – Extruder steps per mm for Greg Wade’s extruder with 32 microsteps.
Piper 3D Printer Settings Page
These settings will change for most printers – Do the research required to find the correct settings
#define DEFAULT_MAX_ACCELERATION { 1000, 1000, 100, 5000 }
#define DEFAULT_ACCELERATION 900 // X, Y, Z and E acceleration for printing moves
#define DEFAULT_RETRACT_ACCELERATION 100 // E acceleration for retracts
#define DEFAULT_TRAVEL_ACCELERATION 2000 // X, Y, Z acceleration for travel (non printing) moves
#define DEFAULT_XJERK 4.0
#define DEFAULT_YJERK 4.0
#define DEFAULT_ZJERK 0.4
Uncomment this line to reduce vibration
//#define S_CURVE_ACCELERATION
// The size of the print bed
#define X_BED_SIZE 200
#define Y_BED_SIZE 300
// define the Z height
#define Z_MAX_POS 200
// For direct drive extruder v9 set to true, for geared extruder set to false.
#define INVERT_E0_DIR true// For direct drive extruder v9 set to true, for geared extruder set to false.
// Generally expected filament diameter (1.75, 2.85, 3.0, …). Used for Volumetric, Filament Width Sensor, et
#define DEFAULT_NOMINAL_FILAMENT_DIA 1.75
Setup a 3D printer with Marlin 1.1.9
![]()